I started writing PowerShell scripts using the built-in Windows PowerShell Integrated Scripting Environment (ISE) a long time ago. It’s always there for you in Windows and was perfect for what I was doing then. But sometimes, you need more functionality, and that’s where Visual Studio Code (VS Code) comes in. In this blog post, I would like to show you some features which make VS Code my editor of choice.
Installation
Visual Studio Code can be downloaded for free without any license for Windows, but also Linux and Mac. The download page has links for all platforms and formats (x86/x64/ARM/Apple Silicon), choose and download your version here https://code.visualstudio.com/#alt-downloads. You can also install it using Winget by running the following:
winget install Microsoft.VisualStudioCode
First start
After installation and starting it for the first time, it will show you a wizard with tasks you can complete to configure VS Code to your liking.

One of the most important things is Dark Mode, of course 🙂 But the other options are great if you use VS Code on multiple systems, you can configure syncing settings with your other systems.

Choosing ‘Enable Settings Sync’ will show the options available:


After logging in, it will ask what to do with the local settings (In case you already had some local settings before logging in). In this case, it’s a new installation, so you can choose to Replace Local.
Choose which account you want to use:

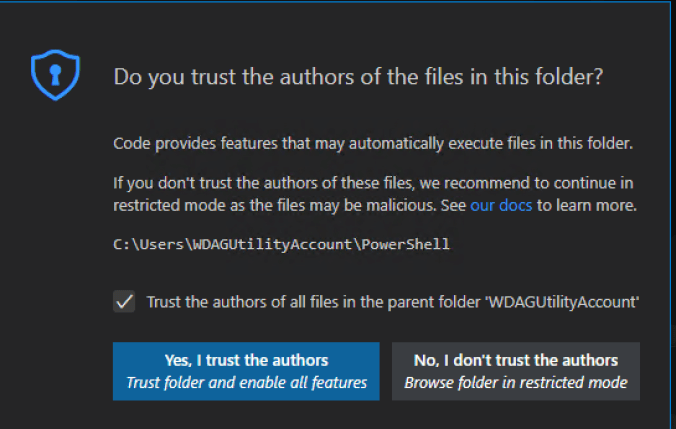
After syncing any settings/extensions that you might have, you can specify the folder where you store all the scripts, this needs to be marked as a trusted folder, and it will ask you to trust it to enable all features (Use the checkbox and choose ‘Yes, I trust…)

PowerShell Extension
After installation, you will need to install an extension so that VS Code will recognize and help you create PowerShell scripts. You can do this by selecting the Extensions button on the left, searching for Powershell (The default sort order is by the number of downloads, the popular extensions are on top), and choosing Install.

After installation, it will show Reload Required. Click the button to reload VS Code and make the extensions available to you.

After the reload, you can create your first script. It might prompt you for another update:

Choose Yes to update PackageManagement and monitor the Terminal output. It will ask you if you want to upgrade. Restart VS Code after the installation.

Now VS Code understands PowerShell and will use Intellisense to complete your syntax:

Code formatting
It’s always nice to have good-looking code. VS Code makes this easy by right-clicking in the script and selecting Format Document:

Before:

After:

Syntax/error highlighting
If you have an error in your script, VS Code will highlight it for you. It will also recommend specific changes, for example, when using select instead of select-object or when you have a variable that was never used further in the script. This looks like this:

Command completion
VS Code uses templates/snippets to easily insert things like for instance, a function (It also completes commands if you typed the first few letters), just type the function on an empty line and use the TAB key:

Or do followed by TAB:

You can also press CTRL-Space to get a list which you can scroll in using the Arrow-Down key:

Press Enter to use it, for example, Try-Catch-Finally:

Using GIT in VS Code
If you’re a GIT user, then VS Code will recognize that when opening a folder that is in Github/Gitlab. When editing a file, the Source Control button on the left side will indicate if there is a change in a file that needs reviewing or changing:

It will show you the differences between the original file and the changed file:

In this case, it was just removing space between the brackets. When using the Commit button (The Checkmark icon), it will prompt for a reason for the update and commit it to Github/Gitlab:

You need to press Sync Changes, and you’re done.

For more in-depth information on how to use GIT in VS Code, you can refer to the Microsoft website https://code.visualstudio.com/docs/editor/versioncontrol.
Switch (back) to PowerShell ISE look-and-feel
If you don’t like, or can’t get used to, the VS Code theme… Then you can change it to look like ISE 🙂 You can do this by pressing CTRL-Shift-P and typing ISE:

Choose Enable ISE Mode and… Voila 🙂

You can switch back by pressing CTRL-Shift-P, entering ISE, and selecting Disable ISE Mode.
fantastic explanation and excellent for anyone who was used to using the old Powershell ISE and wants to continue with Powershell 7
Thank you 😊
Pingback: PowerShell is fun :)Three ways to start Visual Studio Code