This week, after the official Windows release of Warp on February 26th, I saw many YouTube clips of the new Terminal app. I decided to try it and see what it does differently from my trusty Windows Terminal app. This blog post will show you my first impression of the application.
What is Warp?
“Warp is the intelligent terminal with AI and your dev team’s knowledge built-in.
Key Features:
- Warp AI: AI integrated in your terminal for natural language input, autofill, and intelligent suggestions.
- Warp Drive: Notebooks, workflows, and environment variables for you to use personally or with your team.
You can fully customize Warp’s appearance, prompts, settings, and keybindings to fit your preferences. Warp works with zsh, bash, fish, and PowerShell, and is built with Rust for high performance.”
Source: https://docs.warp.dev/getting-started/what-is-warp
Installing Warp
You can download the installer from their download page here: https://www.warp.dev/download. I chose to install it using WinGet:
C:\Users\HarmVeenstra> winget install Warp.Warp
Found Warp [Warp.Warp] Version v0.2025.02.24.20.50.stable_04
This application is licensed to you by its owner.
Microsoft is not responsible for, nor does it grant any licenses to, third-party packages.
Downloading https://app.warp.dev/download/windows?version=v0.2025.02.24.20.50.stable_04&arch=x86_64
  32.4 MB
Successfully verified installer hash
Starting package install...
Successfully installed
First start
After installation, the Warp terminal immediately showed me this screen, which began a PowerShell session and showed a “Welcome to Warp!” screen:

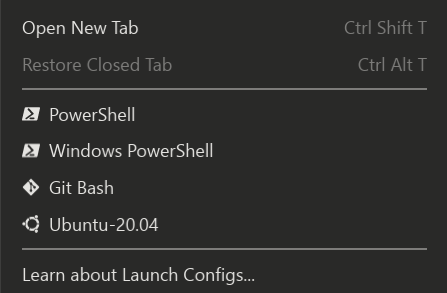
It also recognized that I have PowerShell v5 and v7, Git Bash, and Ubuntu-20.04 WSL on my system in the pull-down menu:
Working with Warp
After browsing through the Settings menu and disabling AI in my case because I don’t use it, I tried my first cmdlets in a PowerShell v7 session. After typing “Get-Proc” and hitting Tab, Warp showed me these auto-complete suggestions:
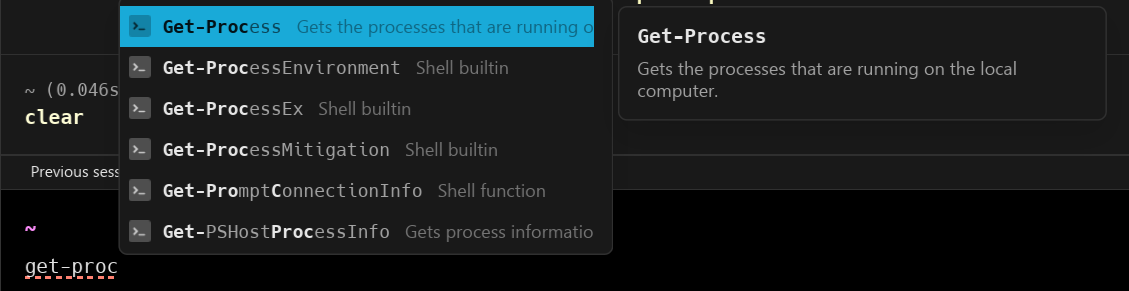
Friendly and with details about the Get-Process cmdlet and the other cmdlets matching “Get-Proc”. After selecting Get-Process with my cursor key and hitting Enter, it showed me a suggestion from my command history to output it into a Console-Gridview:

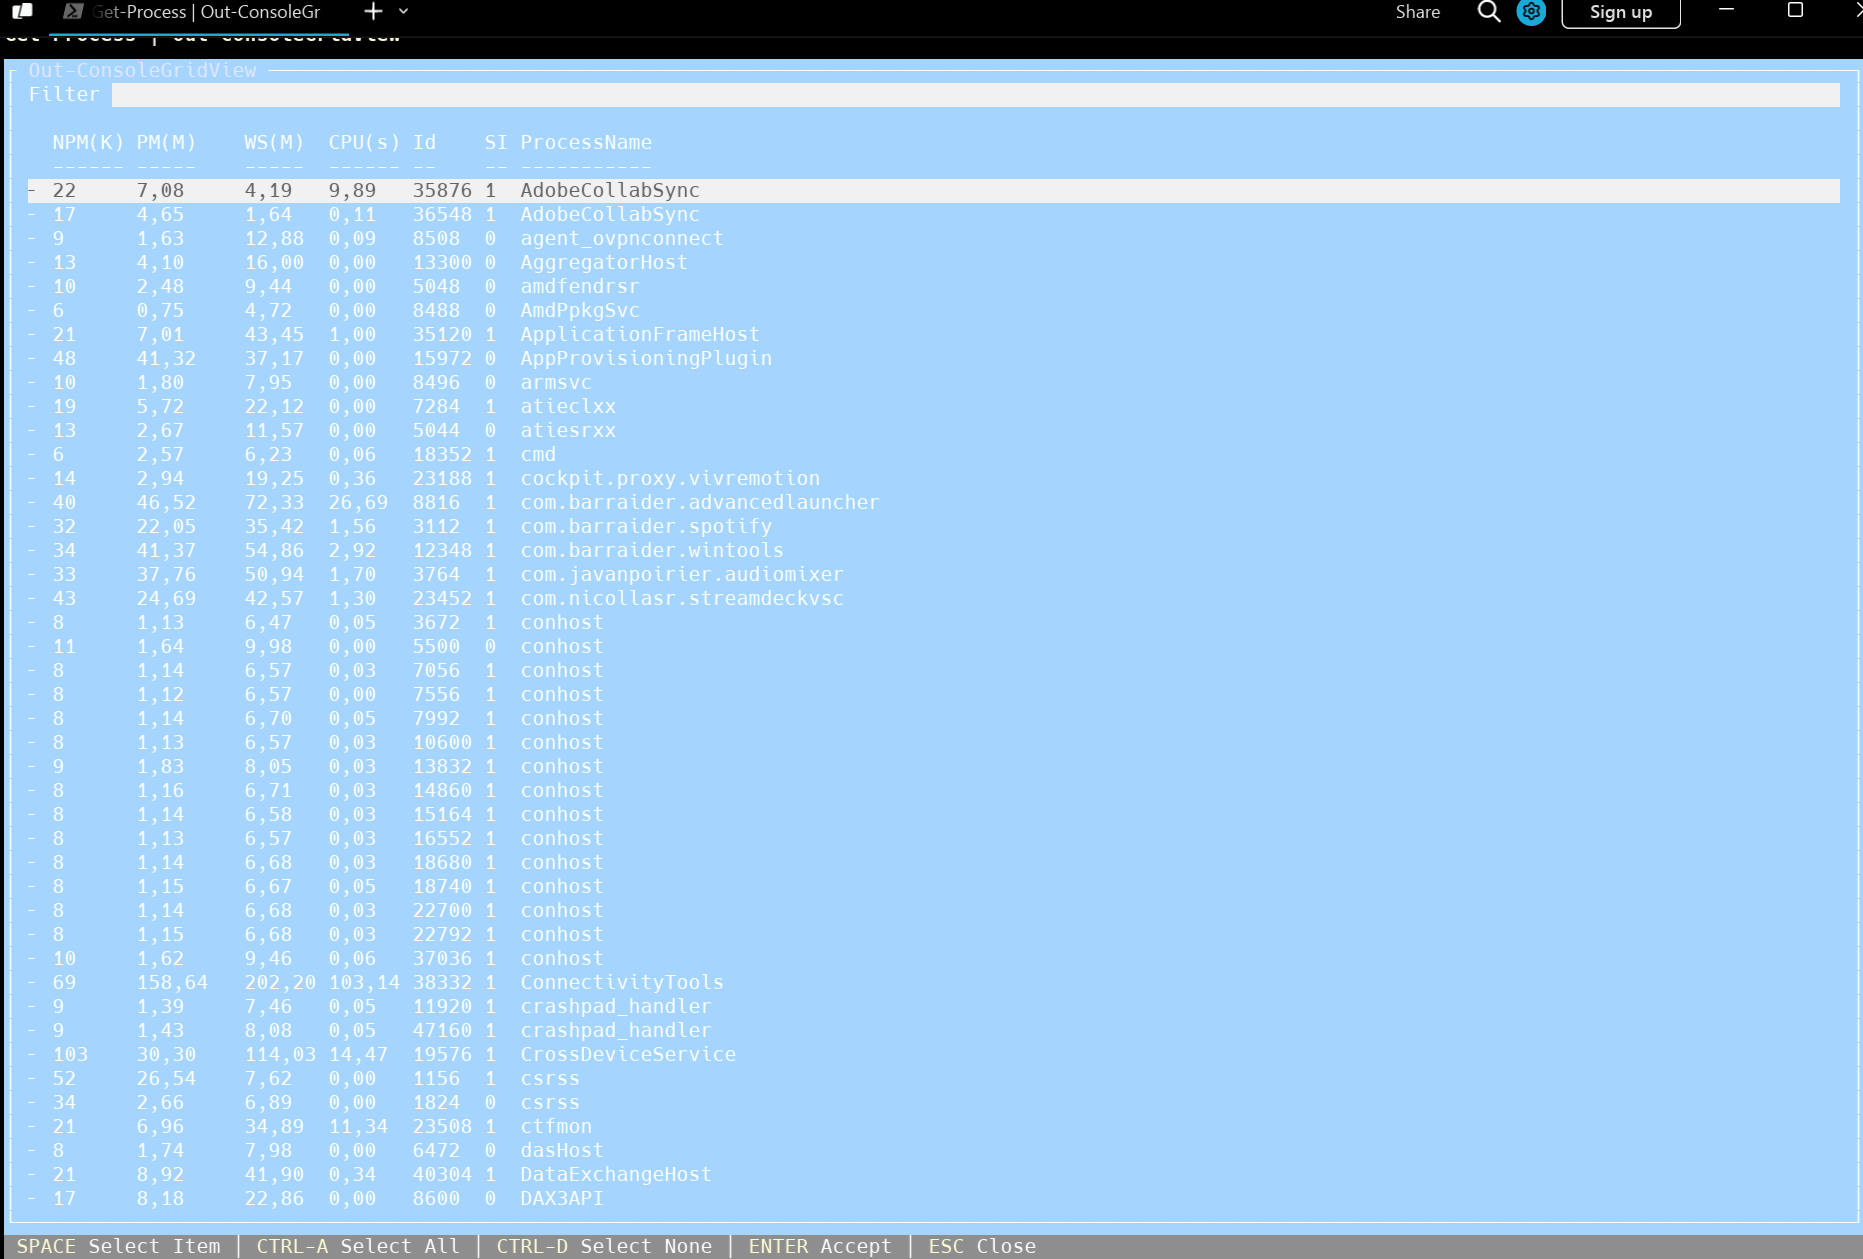
After hitting the -> key, it auto-completed that and showed me the results:
The nice thing is that it shows previous commands in the Terminal as different boxes, which you can save as a workflow:
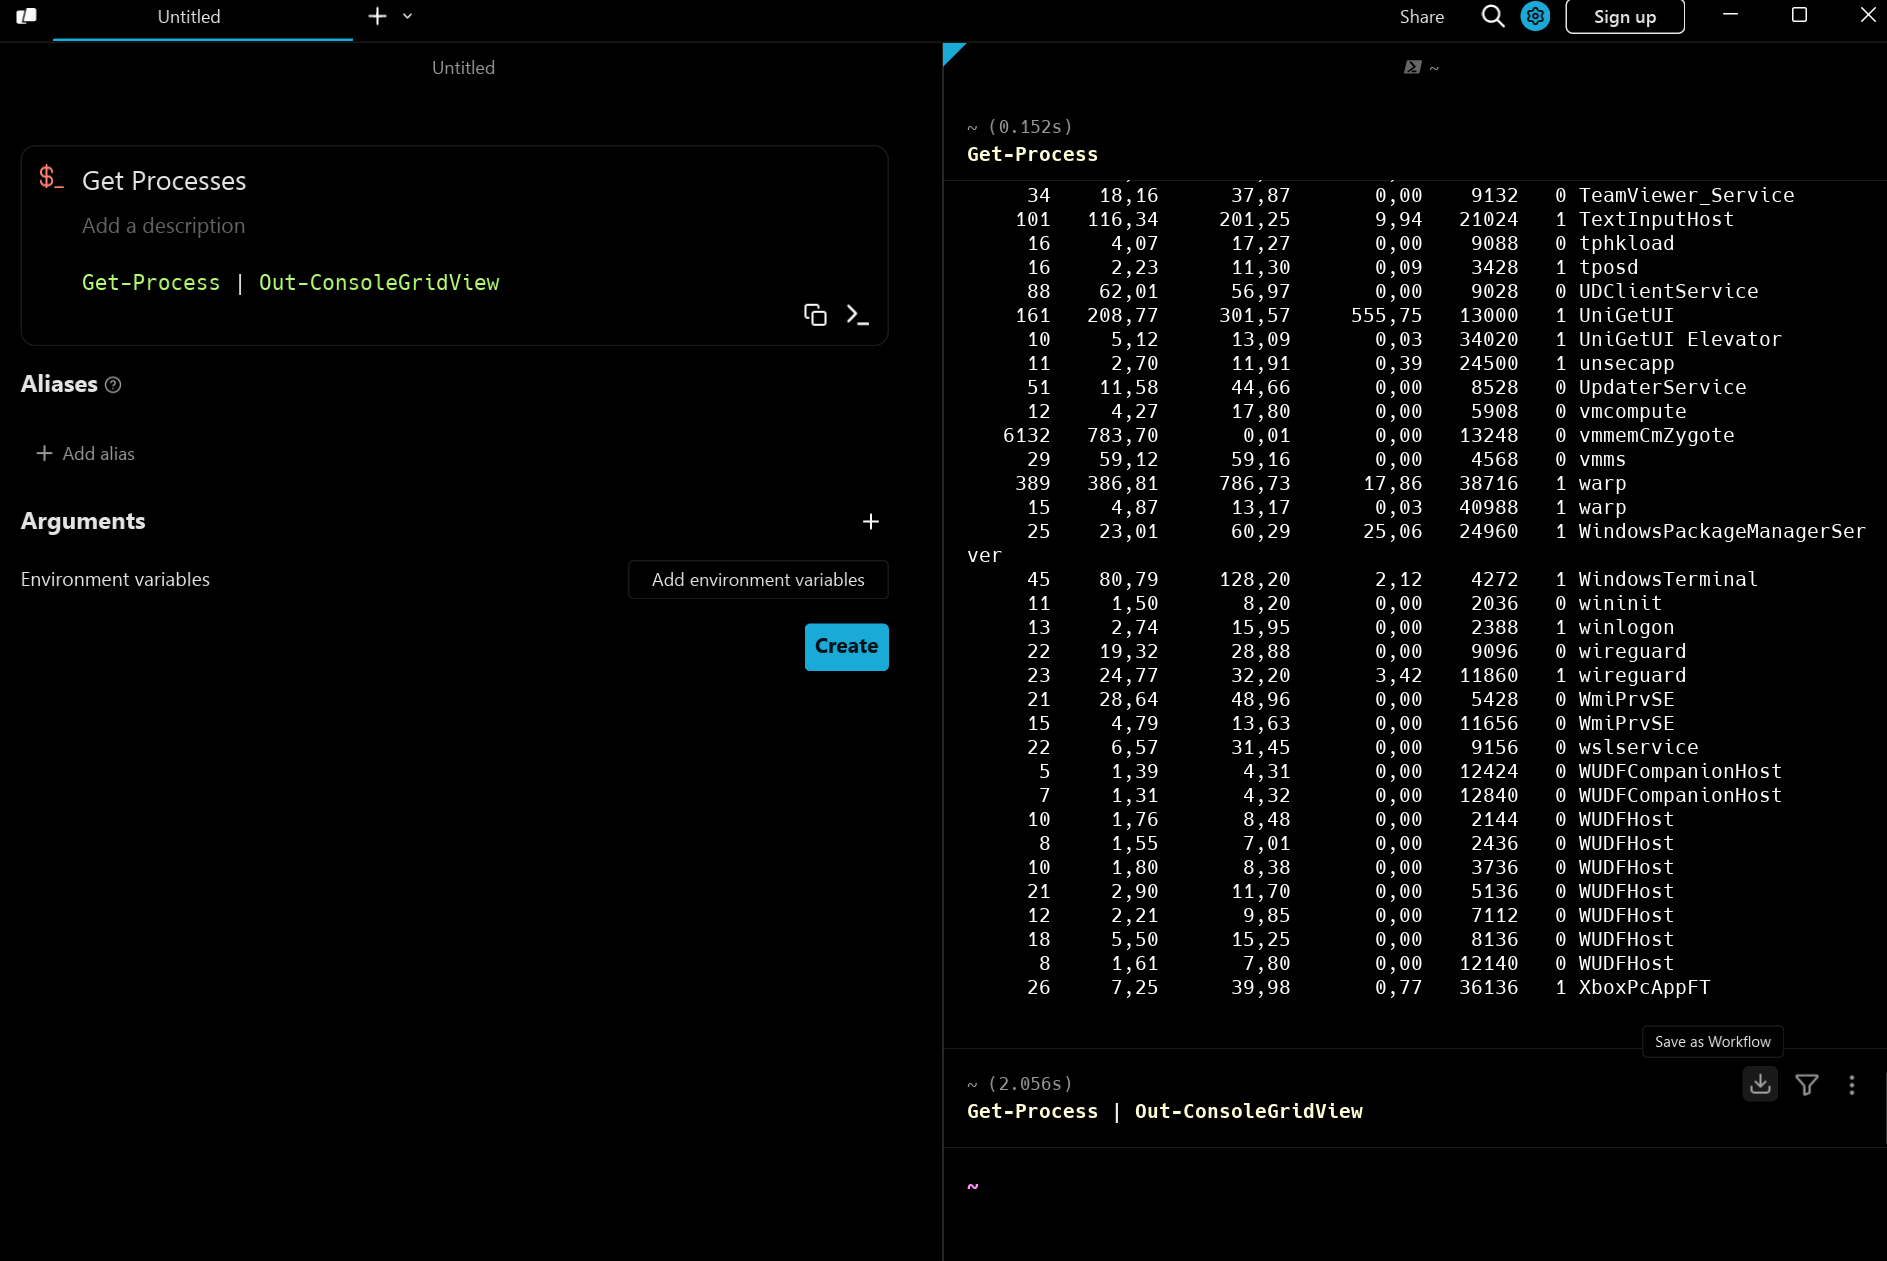
After saving, the workflow is accessible when clicking the Warp icon in the top left:

This is the place to access your workflows, but storage is limited until you sign up. That brings me to the next chapter: Pricing.
Pricing
I chose the free model now first, but there are other models:
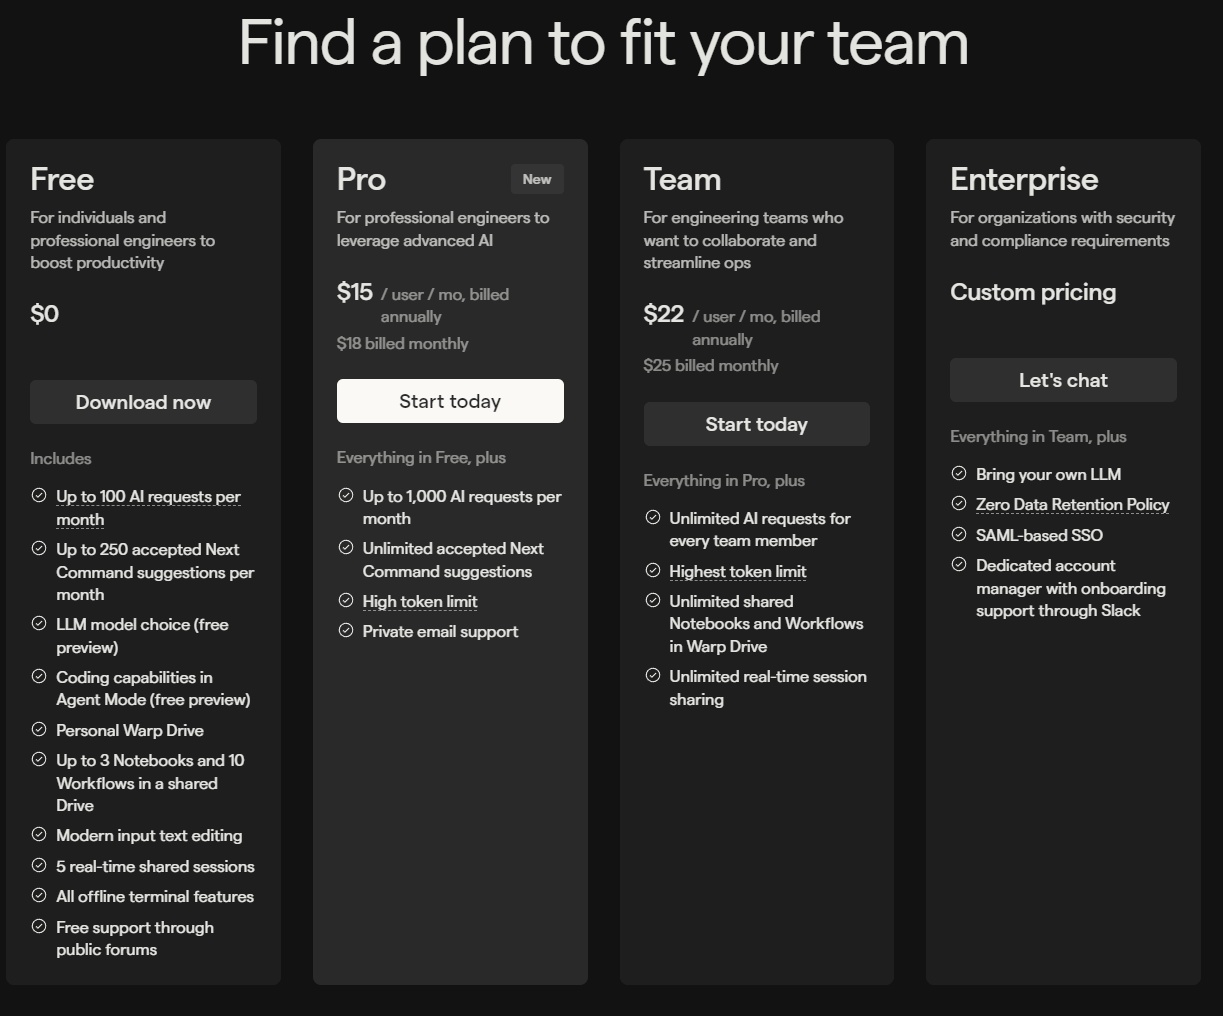
As you can see, the pricing depends on the number of AI requests you can make and the number of Next Command suggestions you receive.
Other features
I played around with it a bit more, and it sure has some nice/unique features compared to Windows Terminal:
Filter block output
You can click on Filter Block Output in any block to filter text:
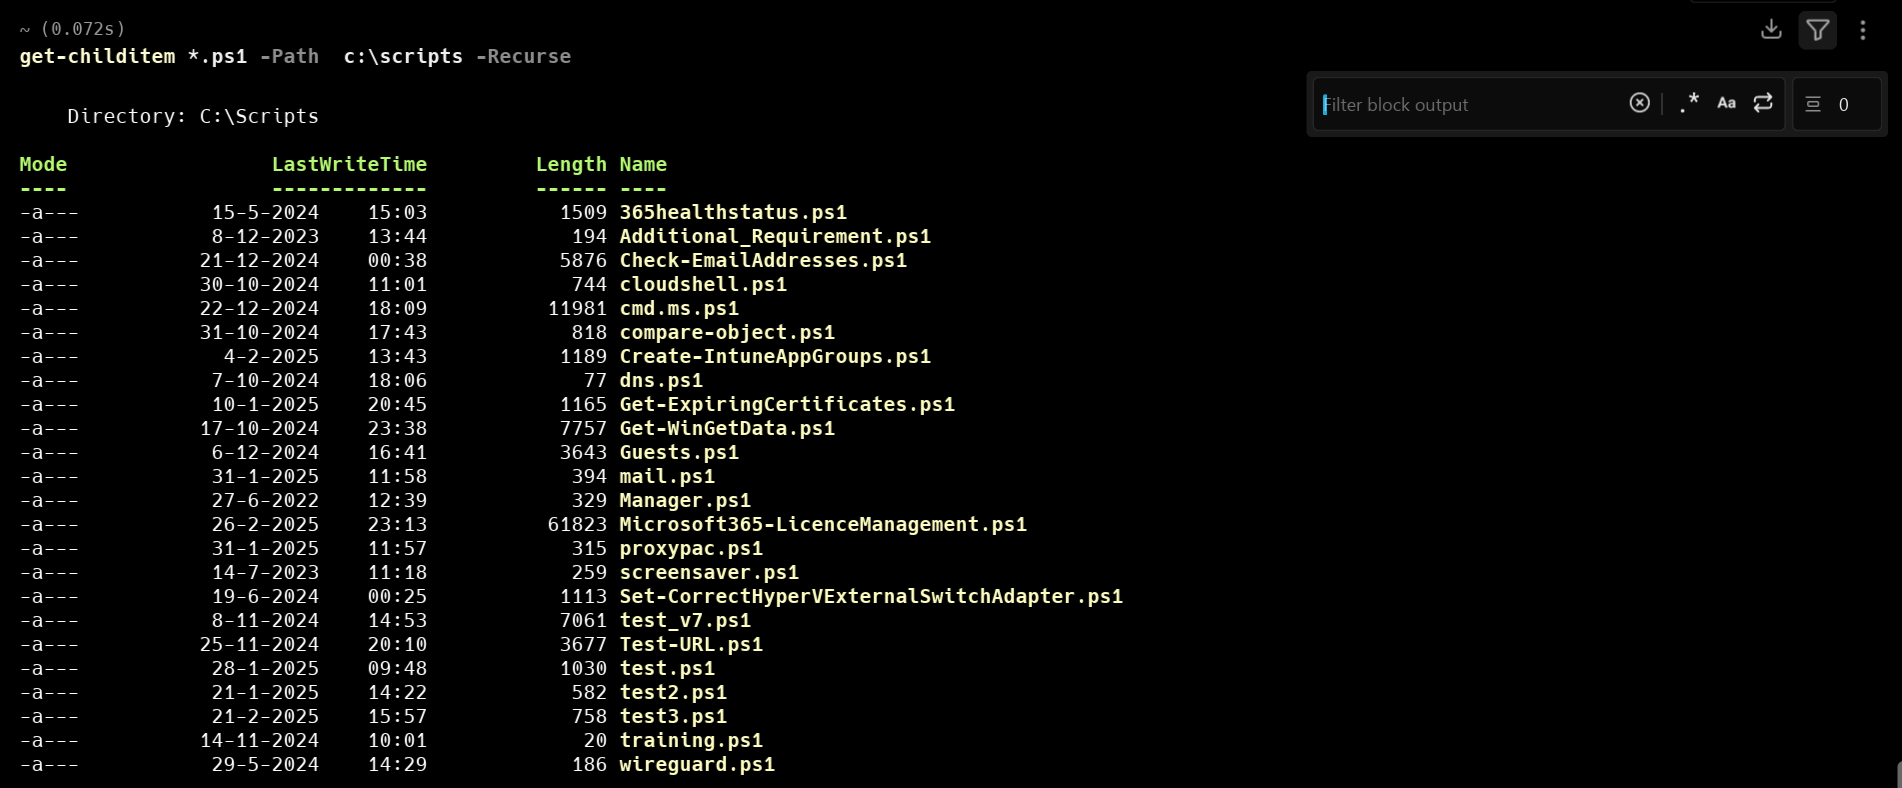
After typing “Winget” it showed me this:

Nice if you have a large amount of screen output and want to search for a specific keyword!
Sharing
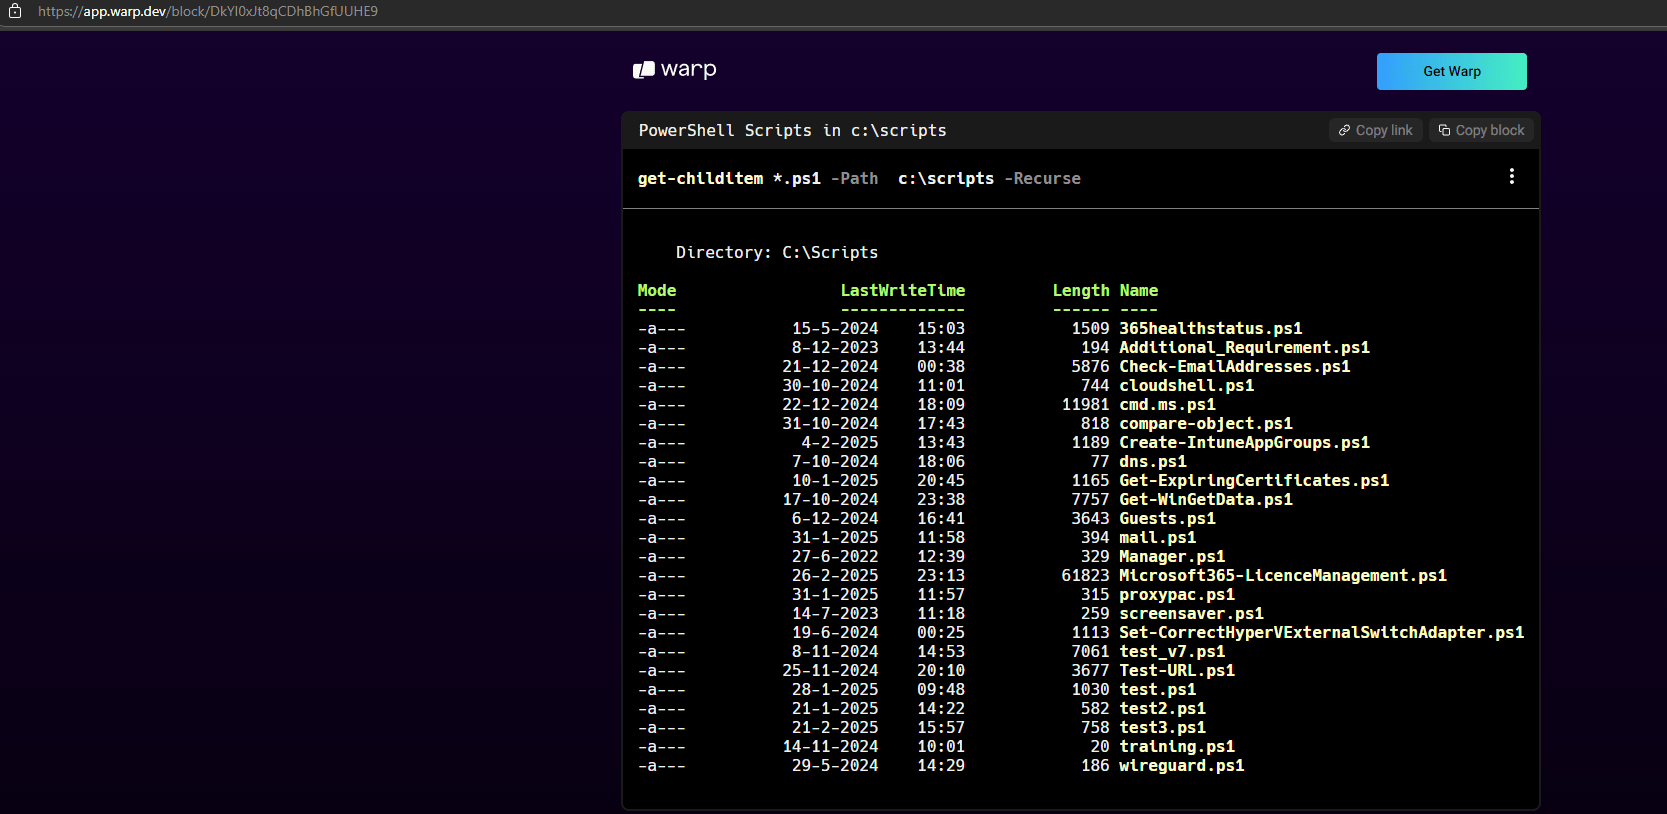
You can share a specific block or session with other people:

You can redact secrets if needed, and after clicking the Create link, you will get a shareable link which (when opened) will show you this:
Or even as embedded code, which will look like this:
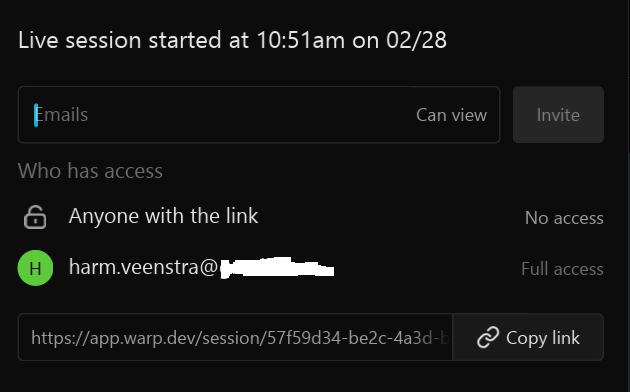
But you can also share your whole session using the Share button in the bar above:

After selecting Start Sharing, you can invite people using the link:
It is pretty powerful, and I have to test that with some colleagues 🙂
Keyboard shortcuts
There are a lot of keyboard shortcuts by default:
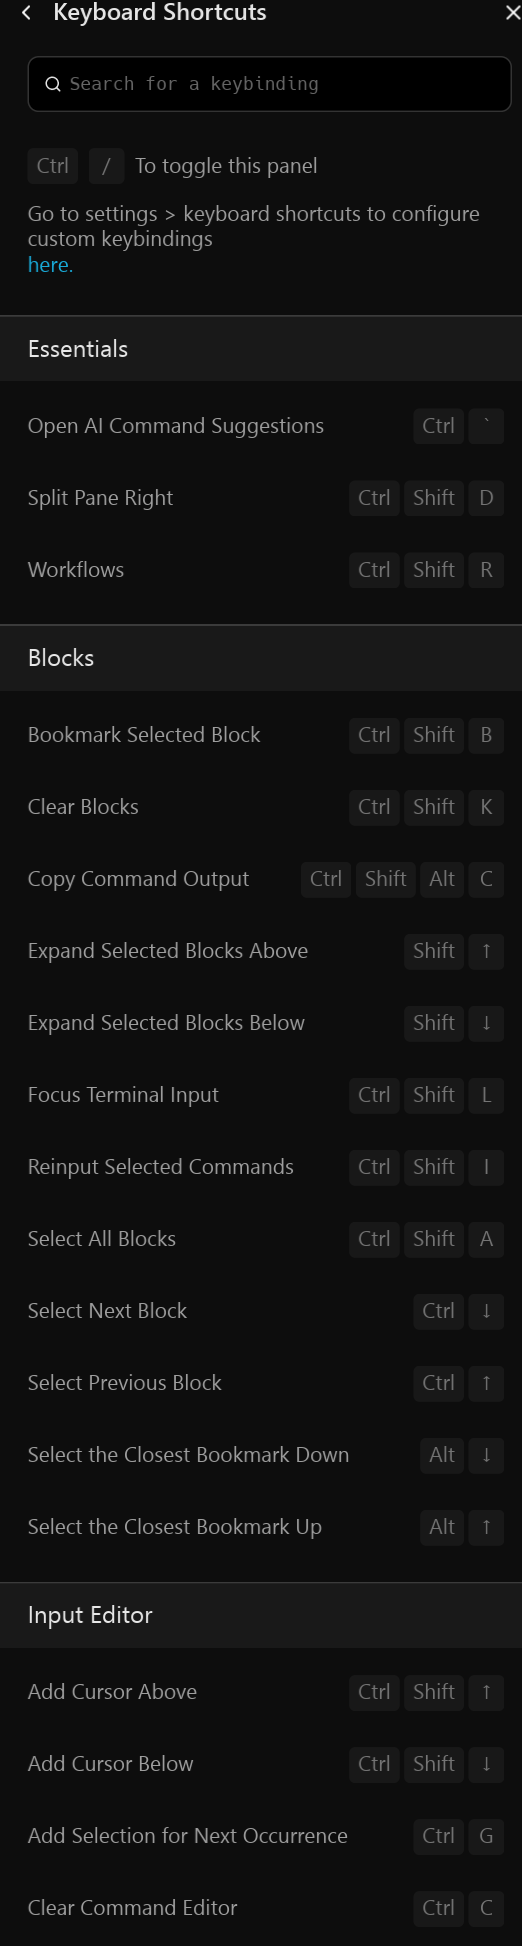
You can create your own to optimize workflow in the Settings menu.
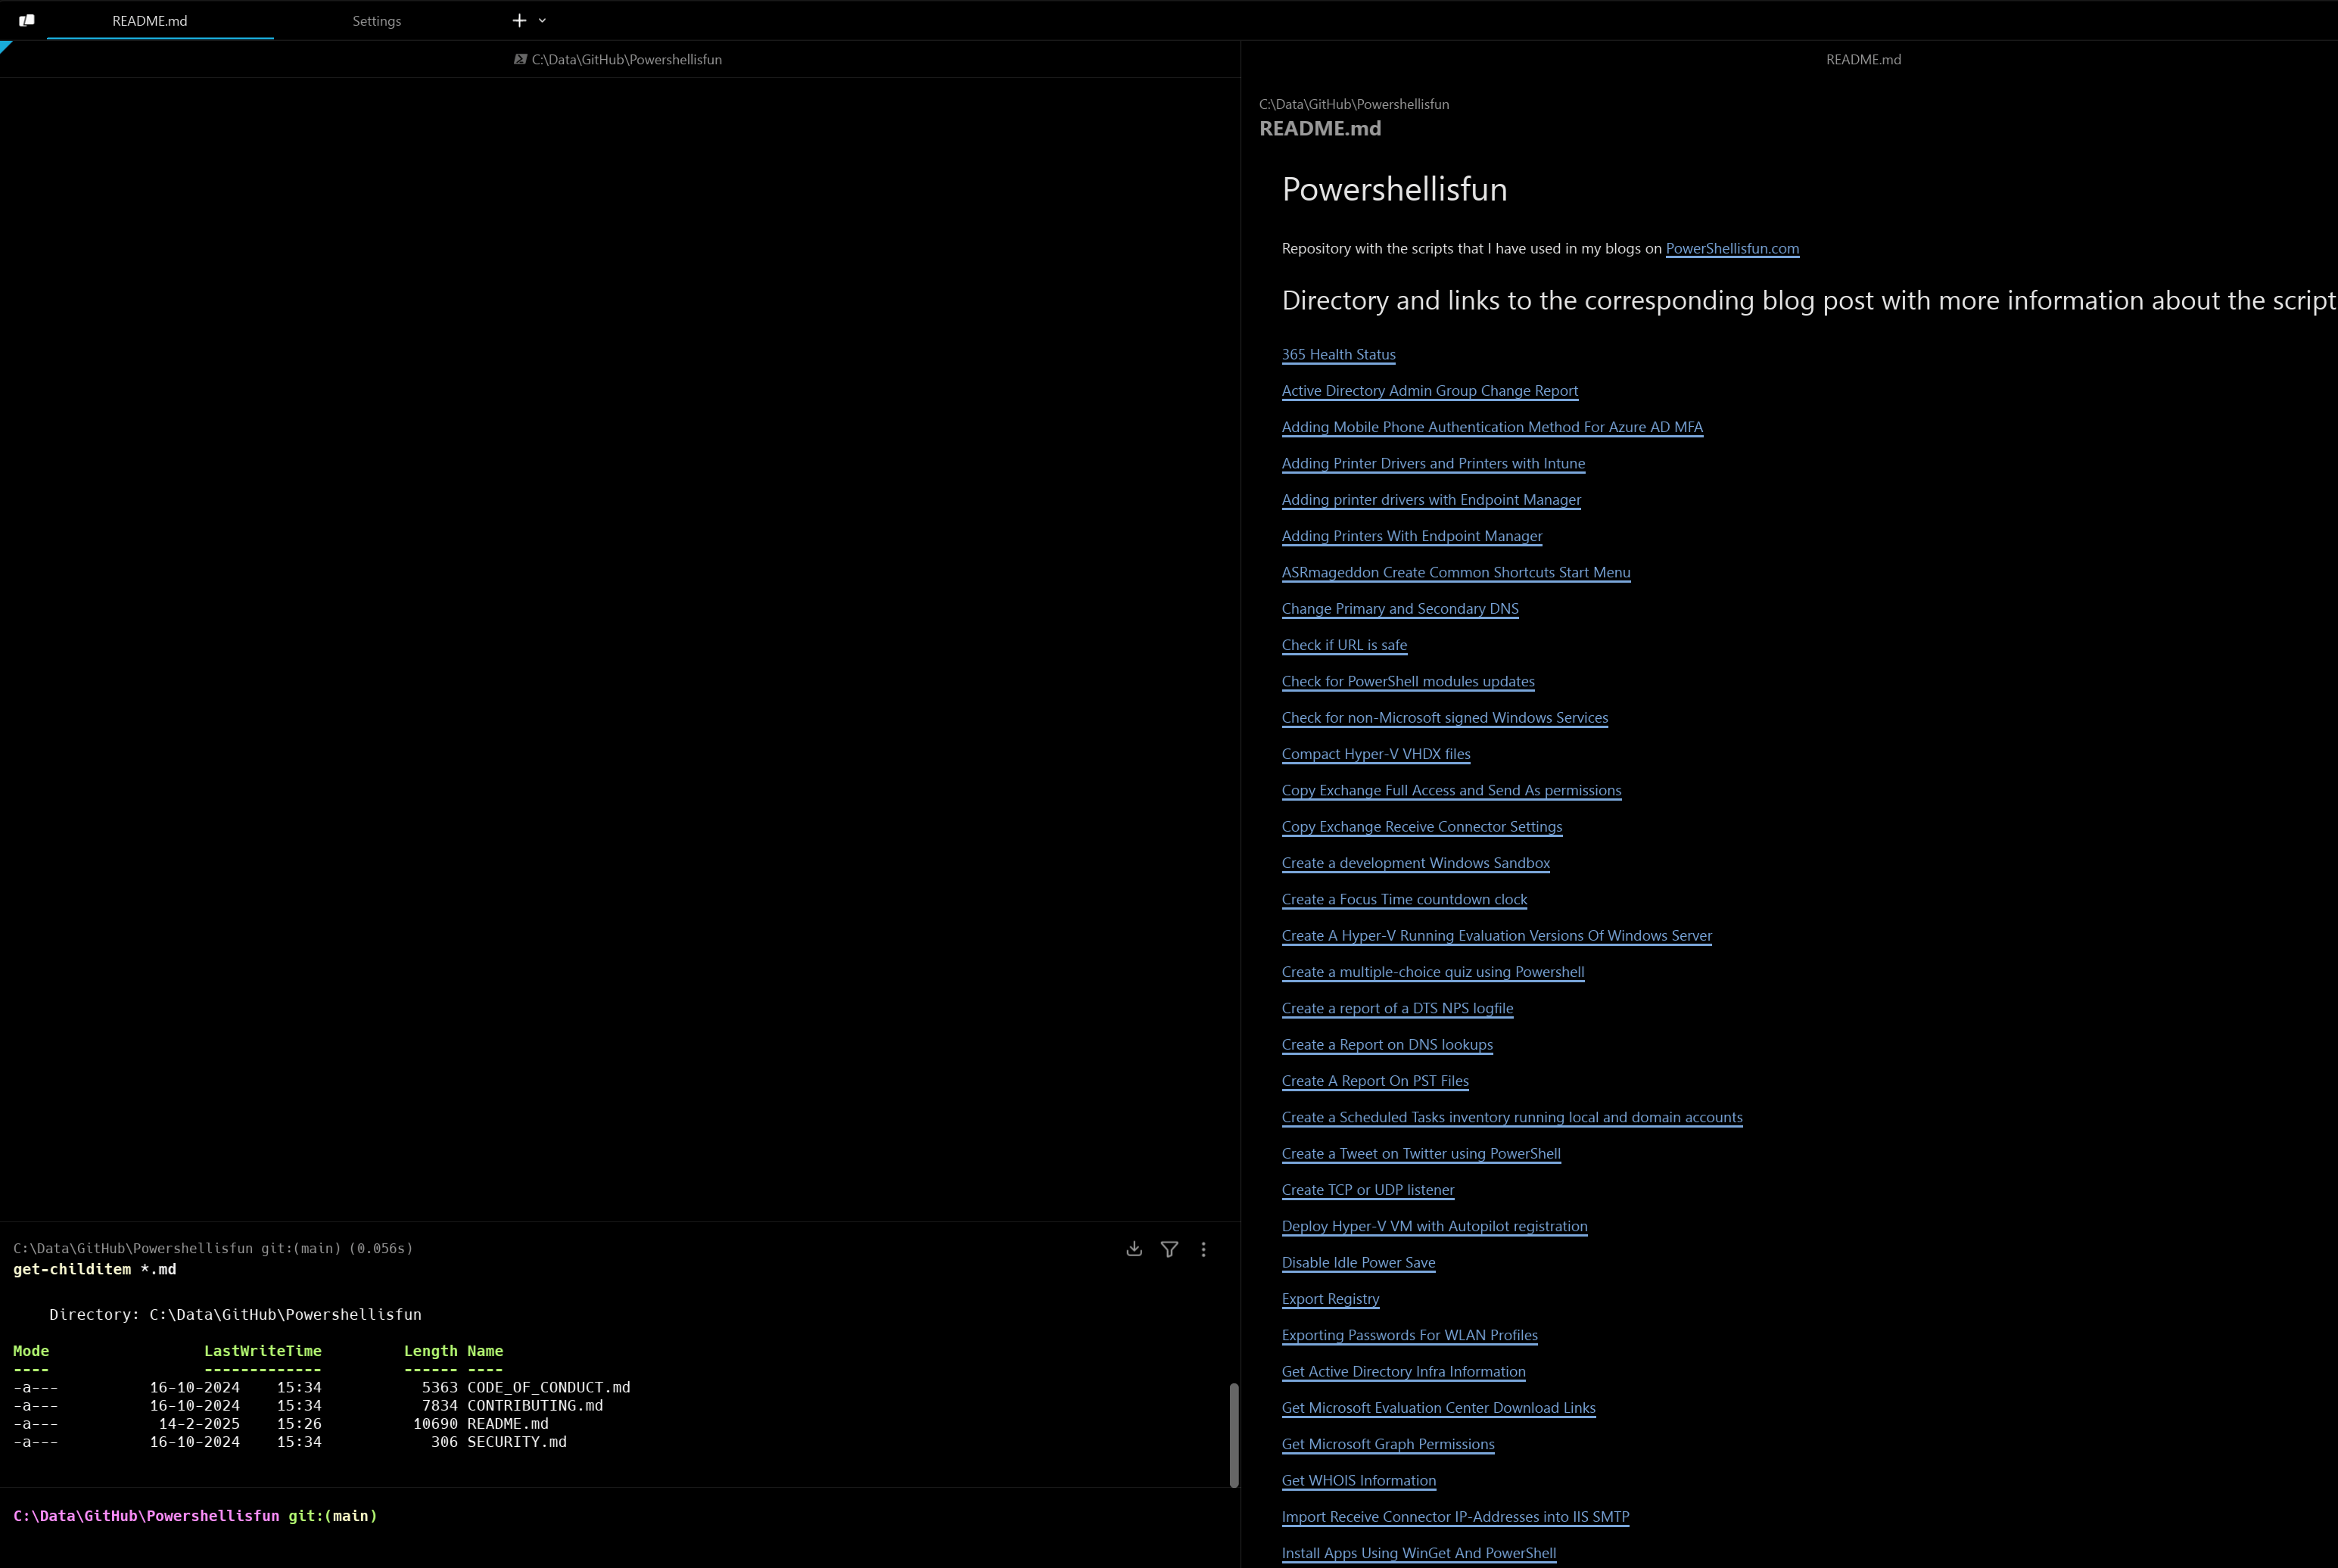
Markdown viewer
When you have a .md file in your terminal, you can open it in Warp to view it:
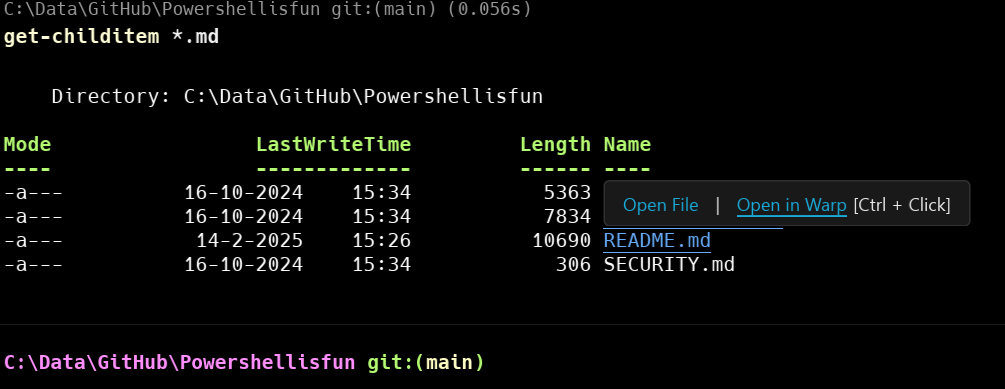
After selecting Open in Warp:
Git Support
The PowerShell prompt also Git support, and it showed that I had one file that was not committed yet:

Windows Terminal does the same, but there I use the Posh-Git module, and it shows it like this:

Wrapping up
That was my first impression of a very promising Windows Terminal App. It was already there for Linux and Mac, and I will continue testing it in the next few weeks. Have a lovely weekend!
Note: Warp does not sponsor this blog post. They contacted me earlier, but the test version didn’t work on my device, and I couldn’t write a blog post about it for them because of that on their release day. This final version does work, and these are my first impressions of it, without any sponsorship for this post.
After I installed WARP I received a “WELCOME TO WARP!” screen suggesting 4 examples how to use AI using Agent Mode (python snake game, git history, create matrix-style theme, and ‘something else’).
How can I get those examples to display again when I reopen WARP?
Thanks,
Dan
I’m not sure 😅I only got that after first launch too, but you should be able to ask that using Ctrl-I?
I tried that, but no luck.
Thanks anyhow,
Dan
Uninstall, reinstall perhaps?
I tried that as well; not surprisingly it did reshow the same 4 examples but are unretrievable after that. I was able to track down their contact page (https://www.warp.dev/general-inquiries) and asked the same question. I’ll be certain to update this thread if they reply.
Thanks again for all your PS articles and support!
Dan
No problem, and curious for their answer!
Should they reply, you’ll be the first to know.
🙂
I just reopened my question with WARP support and they quickly replied that everytime a new tab is opened, the 4 questions that appeared after the installation will be redisplayed, which I confirmed to be accurate.
Not only is the product remarkable but their support is friendly and eager to help.
Dan
Nice! Always nice to have user friendly support!
Is Warp truly a smarter alternative to Windows Terminal with AI features, or does it just offer a fresh interface without significant improvements? Regard Ilmu Komunikasi
It has its features and benefits, but so has Terminal… You have to try and see for yourself what fits your work flow best. Personally, I’m back to Terminal for now