What’s the first thing that you install on your new MacBook M4? Yes, Microsoft Edge, and then PowerShell afterwards 😉 In this final blog post of 2025, I will outline the available installation options.
Context
I’m writing this because I’m installing macOS on my first MacBook (a 13-inch Air M4 with 24 GB RAM/512Gb SSD) and wanted to share my PowerShell installation steps. The Microsoft Learn page also covers them, but I will try them all and demonstrate how they work in the chapters below.
Install using
Homebrew
I’m used to installing everything on my Windows devices with WinGet, but macOS doesn’t have a package manager like that. Homebrew is the macOS version of that, but it seems more focused on developer apps and tools than on (like WinGet) all official apps with vendor support, etc.
First step is to install Homebrew itself, which can be done using Terminal:
/bin/bash -c "$(curl -fsSL https://raw.githubusercontent.com/Homebrew/install/HEAD/install.sh)"
This will start the installation after giving an overview of the things that will be installed and created on your system:

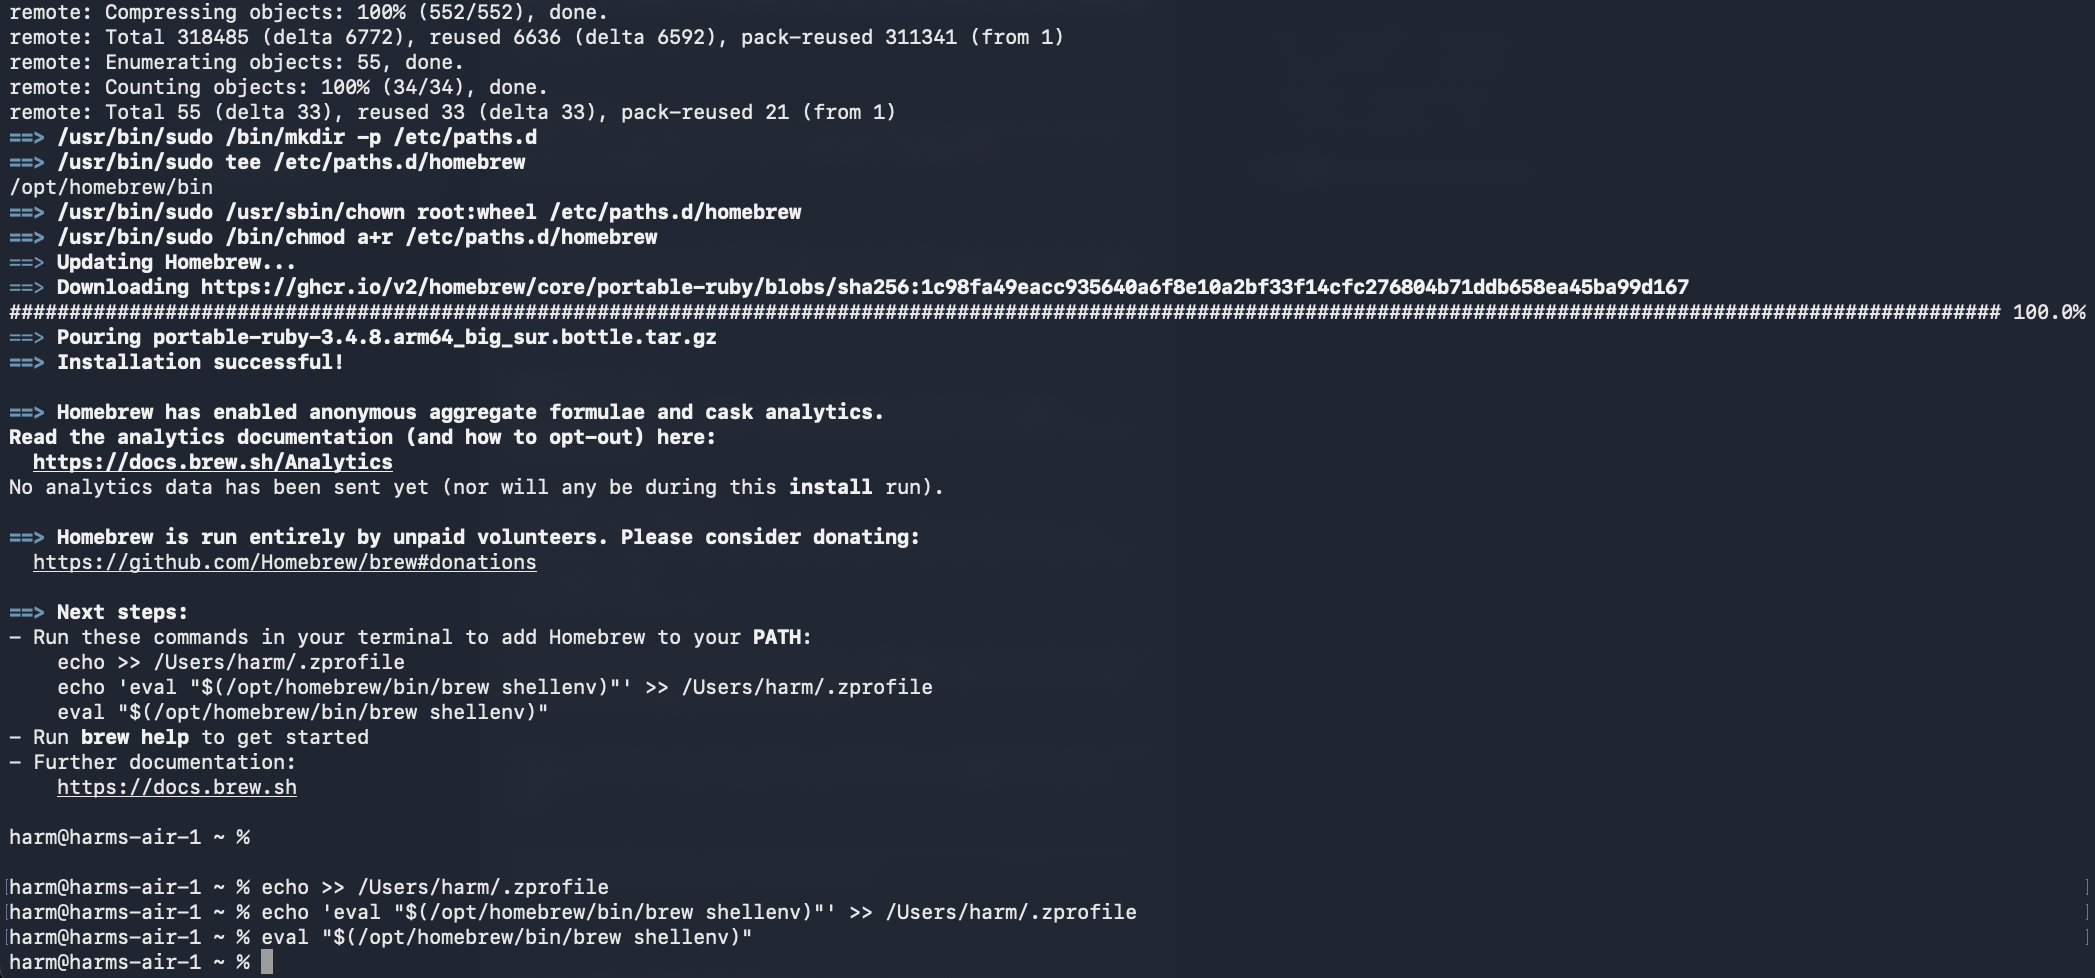
After installation, it will propose to add Homebrew to your path, which I did:
Now that Homebrew is installed, you can run this to install the latest stable version of PowerShell v7:
brew install --cask powershell
After installation, you will see a nice beer icon if it was successful, 🙂

Note: Installation does state this warning: powershell has been deprecated because it does not pass the macOS Gatekeeper check! It will be disabled on 2026-09-01. You can find more information about that here: https://github.com/PowerShell/PowerShell/issues/26061 (It’s because of Apple’s runtime protection, signing/notarization will be needed to fix Gatekeeper checks after September 1st, 2026)
You can now start PowerShell from the Terminal by running pwsh:

But if you start it using Finder, it will prompt you to install Rosetta if you didn’t have that installed already:

After installation, it just starts normally:

You can update to newer versions by running:
brew update
brew upgrade powershell
You can also install the Preview or LTS version using Homebrew by running:
brew install powershell/tap/powershell-preview
or
brew install powershell/tap/powershell-lts
And you can start them by running either pwsh-preview or pwsh-lts. You can update them by running brew update, followed by either brew upgrade powershell-preview or brew upgrade powershell-lts.
Direct download
You can also download the installation file, .PKG, directly to your system, and start the installation that way. The links to the current versions are:
PowerShell 7.4 (LTS)
Arm64 processors – powershell-7.4.13-osx-arm64.pkg
x64 processors – powershell-7.4.13-osx-x64.pkg
PowerShell 7.5
Arm64 processors – powershell-7.5.4-arm64.pkg
x64 processors – powershell-7.5.4-osx-x64.pkg
PowerShell 7.6-preview
Arm64 processors – powershell-7.6.0-preview.6-osx-arm64.pkg
x64 processors – powershell-7.6.0-preview.6-osx-x64.pkg
Link to all releases here: releases
I downloaded the Arm64 version of PowerShell 7.5 and double-clicked it from my Downloads folder, and got this:

Ok… That doesn’t feel right 😀 Selected Done and read the article on Microsoft Learn. This error message comes from macOS’s Gatekeeper feature. For more information, see Safely open apps on your Mac – Apple Support.
After you’ve tried to open the package, follow these steps:
Open System Settings.
Select Privacy & Security and scroll down to the Security section.
Select the Open Anyway button to confirm your intent to install PowerShell.
When the warning prompt reappears, select Open Anyway.

The same window will appear again, but with the Open Anyway option. Select that, enter your password, and run through the installation questions and prompts.

At the end of installation, it will ask you to move the .PKG file to the Trash or Keep it. I choose Keep, but you can always download it again, of course 😉
Now that it is installed, you can find PowerShell in your application list and start it, or run it from a Terminal by typing pwsh.

You can also start the installation from the Terminal:
sudo installer -allowUntrusted -pkg ./Downloads/powershell-7.5.4-osx-arm64.pkg -target /
Running this will prompt for access to your Downloads folder from the Terminal:

Select Allow, and the installation will start. Afterwards, you can start using it as mentioned above through Finder or by running pwsh in a Terminal.
To avoid issues or having to go to the Security page in Settings, you can run this to unblock the file:
sudo xattr -rd com.apple.quarantine ./Downloads/powershell-7.5.4-osx-arm64.pkg
.NET Global Tool
You can also use the dotnet tool installation method if you already have the .NET Core SDK installed. If not, you can install that by
- Downloading https://dot.net/v1/dotnet-install.sh
- Start a Terminal session and run chmod u+x ./dotnet-install.sh,
- Run echo ‘export DOTNET_ROOT=$HOME/.dotnet’ >> ~/.bashrc
- Run echo ‘export PATH=$PATH:$DOTNET_ROOT:$DOTNET_ROOT/tools’ >> ~/.bashrc
- Start a new Terminal Session
- Run ./dotnet-install.sh –runtime dotnet –version 6.0.0
Afterwards, you can run this to install PowerShell
dotnet tool install --global PowerShell

If you don’t have .NETCore v 9.0.0 or higher installed, it will prompt you for that:

Download https://aka.ms/dotnet-core-applaunch?framework=Microsoft.NETCore.App&framework_version=9.0.0&arch=arm64&rid=osx-arm64&os=osx.26 and follow the steps from the installer:

I still had issues, though, until I ran ./dotnet-install.sh –runtime dotnet –version 9.0.11, and afterward, PowerShell started by running pwsh in a Terminal.
Binary archives
You might have a use case for not using installers, but instead downloading all the PowerShell binaries for your macOS system. You can do that by downloading the installation package from the releases page onto your Mac. The links to the current versions are:
- PowerShell 7.4 (LTS)
- Arm64 processors – powershell-7.4.13-osx-arm64.tar.gz
- x64 processors – powershell-7.4.13-osx-x64.tar.gz
- PowerShell 7.5
- Arm64 processors – powershell-7.5.4-osx-arm64.tar.gz
- x64 processors – powershell-7.5.4-osx-x64.tar.gz
- PowerShell 7.6-preview
- Arm64 processors – powershell-7.6.0-preview.6-osx-arm64.tar.gz
- x64 processors – powershell-7.6.0-preview.6-osx-x64.tar.gz
Use the following commands to install PowerShell from the binary archive. Change the download URL to match the version you want to install.
For example, I used this to install PowerShell v7.5.4 on my system:
curl -L -o /tmp/powershell.tar.gz https://github.com/PowerShell/PowerShell/releases/download/v7.5.4/powershell-7.5.4-osx-arm64.tar.gz
sudo mkdir -p /usr/local/microsoft/powershell/7
sudo tar zxf /tmp/powershell.tar.gz -C /usr/local/microsoft/powershell/7
sudo chmod +x /usr/local/microsoft/powershell/7/pwsh
sudo ln -s /usr/local/microsoft/powershell/7/pwsh /usr/local/bin/pwsh
Which looked like this:

Uninstall
Homebrew
You can run this to uninstall PowerShell from your system if installed using Homebrew:
brew uninstall --cask powershell
Direct download
If you downloaded and installed PowerShell using the install archive file, you can use this to uninstall it from your system:
sudo rm -rf /usr/local/bin/pwsh /usr/local/microsoft/powershell
.NET Global Tool
You can use the dotnet command-line tool to uninstall it from your system using:
dotnet tool uninstall --global PowerShell
Binary archives
Because this installation method does not use an installer, you can remove all the installation folders and links using this:
sudo sudo rm -rf /usr/local/microsoft/powershell/7
Wrapping up
And that’s how you can install PowerShell 7 on your macOS system. It was my first time, and I followed the excellent Microsoft Learn article for all the options listed above. It’s nice to have options, I think Homebrew (Because it works similarly to WinGet to me) is the easiest. Have a lovely Christmas and a happy New Year. This is my last blog of the year, and I hope to see you all next year!
I would have used from the terminal xattr -d com.apple.quarantine file location and I never use chmod 777, u+x is more then sufficient.
Thanks, changed that in the blog post now 🙂